What Are Everest Trek Permits and Why Do You Need Them
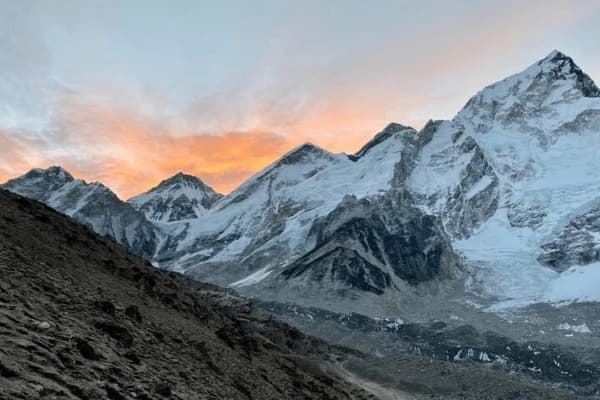
A trekking permit can be simply defined as an entry ticket to a protected mountain range. Think of it like a theme park ticket, but instead of a theme park, it allows you to hike through Sagarmatha National Park and the Khumbu Pasang Lhamu Rural Municipality. Both areas need one or more forms of official permission to enter and are included in the trek to Everest Base Camp.
The reasons for requiring a trekking permit are as follows:
- To provide funds for trail maintenance and conservation of the natural environment (by collecting fees to pay to maintain trails and protect the natural environment, as well as having those fees used to assist with the Khumbu region's communities).
- To give people an account of who is entering the area and when (for Search and Rescue) when hiking on the trails.
- To encourage responsible hiking in the Khumbu region by fining unregistered persons found in restricted areas of the Khumbu Region and escorting that person out of the area.
If you do not possess the necessary permits, rangers at the various entry checkpoints can send you back. This is not simply a "technicality," it is uniformly enforced. Having no permit equals no trek, no matter how far you have already travelled to reach your destination. Our Everest Base Camp Trek Guide provides a full itinerary of all the preparations you will need to complete prior to commencing the trek, including information on permits.
Types of Everest Trek Permits: Detailed Breakdown
For the standard Everest Base Camp trek, there are two permits currently required. Each one is issued by different authorities, costs different amounts of money, and is checked at different points on the trek. Below is a detailed description of what each one includes.
1. Sagarmatha National Park Permit
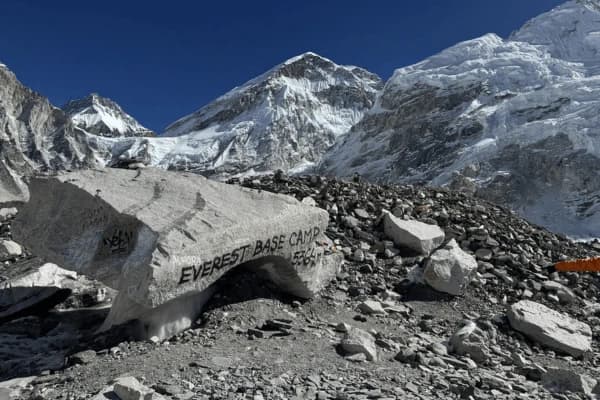
This is the primary entry permit for Sagarmatha National Park, which is also known as a UNESCO World Heritage Site that comprises the entire Khumbu region and includes Everest Base Camp. All trekkers (both independent and guided) must have this permit before arriving at the first checkpoint in Monjo.
Issued by: The Nepal Tourism Board (NTB) issues permits from their office in Bhrikuti Mandap, Kathmandu, or from the park entrance station at Monjo.
Permits cost:
- Non-SAARC citizens (NPR 3000 or approx USD 30).
- SAARC citizens (NPR 1500). For example, citizens of India, Bangladesh, Pakistan, Sri Lanka, Bhutan, the Maldives and Afghanistan.
- Valid for: Permits are valid for the entire length of your trek in the national park.
Documents needed
- Your passport (original).
- A passport-sized photo.
- Completed permit application.
- Payment.
Checkpoint: When you reach the entry station at Monjo, rangers will verify and validate your permit at the entrance of the national park.
2. Khumbu Pasang Lhamu Rural Municipality Permit
The Khumbu Pasang Lhamu Rural Municipality created a local government permit to support the villages along the EBC trekking route. This permit is different from a national park entry permit. Your fees are shared with local communities for infrastructure and service improvements.
Issued by: Obtained from the local government office at Monjo checkpoint or Lukla
- Fee for non-SAARC: NPR 2000 (USD ~20)
- Cost for SAARC is NPR 1,000
- Valid for: All your activities (trek) in the municipality/area covered by the permit.
Documents needed:
- A passport
- Aphotograph
- payment for the permit are required documents
Checkpoint: The permit is issued and checked at Monjo together with the national park entry permit.
3. TIMS Card — Current 2026 Status
All trekkers to Nepal were required to obtain a TIMS Card (Trekkers' Information Management System) prior to beginning their trek. However, in 2026, this requirement was amended for the Everest region; trekkers on a guided trek with a registered trekking agency do not need to obtain their own TIMS Card, as their agency will register on the trekkers' behalf.
In the case of trekkers going independently, they should verify the current TIMS Card requirement with the Nepal Tourism Board or the Trekking Agencies Association of Nepal (TAAN) prior to departing, as this policy is subject to change.
At least, most trekkers departing on a guided EBC package are able to utilize their agency to register for a TIMS Card. Your agency will provide confirmation of this as part of the pre-trek paperwork you receive.
Our team handles all permit arrangements: When you trek with us, we take care of all permits for you: we will provide you with a Sagarmatha National Park Permit and a Khumbu Rural Municipality Permit before you leave, and you will have these permits with you throughout the trek. There is no need for you to go to a government office and stand in line for either of these permits.
Everest Trek Permit Cost Breakdown
Find the entire cost breakdown in one table below with costs displayed as USD as well as in Nepalese Rupee (NPR). Please be aware that the equivalent costs in USD will fluctuate slightly based on the current exchange rate.
|
Permit Type
|
Non-SAARC Trekkers
|
SAARC Trekkers
|
Where to Get It
|
|
Sagarmatha National Park Permit
|
$30 USD / NPR 3,000
|
NPR 1,500
|
Nepal Tourism Board (Kathmandu) or Monjo checkpoint
|
|
Khumbu Pasang Lhamu Rural Municipality Permit
|
$20 USD / NPR 2,000
|
NPR 1,000
|
Monjo checkpoint or Lukla on arrival
|
|
TIMS Card (Current Status)
|
Not currently required for guided trekkers
|
Not required
|
Previously issued at TAAN / NTB offices
|
|
Total Estimated Cost
|
~$50 USD for most trekkers
|
~NPR 2,500
|
See notes below |
If you are trekking to Everest Base Camp as an international trekker, then you can expect to pay around $50 for the total cost of your permits. This is a small portion of the total Everest Base Camp Trek Cost, which is between $1500 and $3000, depending on the holiday season, the comprehensive tour package and the number of services you require during your trek.
Permits are determined by the Nepalese Government, and prices can be modified annually or without any forewarning. You are advised to check the latest confirmation of the permit fees prior to your trek to Nepal with the Nepalese Tourism Board or your trekking company.
How to Get Everest Trek Permits: Step-by-Step
To obtain your Everest Base Camp Trek permits is a very simple process. Below is a step-by-step description of how to obtain your permits, whether you are obtaining your permits in Kathmandu before your flight or arriving on the trail to collect your permits at that time.
- Get your papers together: You will need an original passport and (at least) 2 - 4 photographs of yourself meeting the size criteria , printed out, and money in Nepalese Rupees. If you want to use an ATM in Thamel to get cash to pay for your permits, you should have enough money to withdraw some cash to take with you when you go to the permit office.
- Go to the Nepal Tourism Board Office: The main office that processes applications for Sagarmatha National Park permits is located at Bhrikuti Mandap in Kathmandu, near Thamel. The hours of operation are Sunday through Friday from 9:00 am to 5:00 pm. This is the place you will apply for your permits.
- Complete your Application Form: You will have to complete an application form indicating your personal information, your trekking route, and the dates of entry/exit from the country. If you need assistance completing your application forms, there are staff members at the office to help you. The application forms are very easy to complete, and it typically takes about 5 minutes to complete.
- Pay for Your Permit: All permits are paid for in cash (NPR); a few may accept cash (USD), but it is unlikely. You cannot expect to pay by bank card.
- Pick Up Your Permits: When you pick up your permit(s), you will receive both of your Sagarmatha National Park Permits as well as information on how to get a Khumbu Rural Municipality Permit, if you bring your application forms with you, some will be processed together by agencies acting on your behalf.
- Keep your Documented Copies Accessible: Do not allow your Permits to be located at the bottom of your gear bags. Always carry your permits in your Daypack and store them in a zip-lock bag, and/or a Document Pouch. You will go through a ranger checkpoint in Monjo and all subsequent ranger checkpoints.
- Make Sure You Have a Digital Backup of Your Permits. Take a photo of both your permits, and store the photo on your Phone and in your Cloud Storage. If your original permits are lost or damaged while you are hiking, having a digital copy will help to verify the authenticity of your registration while you wait for a replacement.
- Time required: You should allow 1 to 2 Hours at the NTB Office in Kathmandu if you have all your documents in order when you arrive. If the office is not busy, it is pretty quick to obtain your permits. Generally, the earlier you get there in the morning (prior to 11 AM) less time you will have to wait in line than if you arrive in the afternoon.
Where to Get Permits: Kathmandu vs On the Trail
You'll have 2 options to obtain your permits. Either before you leave on your flight to Lukla, or at ranger checkpoints on the trail after you arrive. Read on for a comparison of both options so you can make the right decision for you.
| Factor |
Kathmandu (Before Trek)
|
On the Trail (Monjo / Lukla)
|
| Convenience |
One stop, both permits sorted before you fly
|
Issued at checkpoints during trek
|
|
Time Required
|
1–2 hours at NTB office
|
30–60 mins at checkpoint
|
|
Documents Needed
|
Passport, photo, payment
|
Passport, photo, payment
|
|
Best For
|
Trekkers flying directly to Lukla next day
|
Trekkers already on trail or with limited Kathmandu time
|
|
Our Recommendation
|
✅ Get both permits in Kathmandu
|
Backup option if you run short on time |
Before taking your Lukla flight, our team recommends obtaining both permits in Kathmandu, as they will save you time and energy. The Monjo Checkpoint can become congested at peak times, such as October and April. When obtaining your permits in Kathmandu, you will avoid long lines at this checkpoint and have an easier time once you've already hiked some distance.
If you are trekking with us, this will be a non-issue; we will facilitate the permit process during your pre-trek day in Kathmandu and will provide you with your documents the evening before your Lukla flight.
Essential Rules and Safety Tips for Everest Trekking
Before you set out on your trekking, the first thing is to acquire the required permits. But it's also important how you behave on the trail. Your conduct is just as important as having your permits. In the Khumbu area, there are a lot of different rules in place for both the protection of trekkers and the environment. So these should be considered prior to entering the trail.
The Golden Rule: Carry Your Permits at All Times
This may seem like a simple rule. But guides typically see trekkers not following it every year. Your permits are official documents issued to you. Along the route, the Monjo checkpoint and various other points will randomly check for them. If you don't have your permits when stopped, you could incur a penalty fee and be removed from the trail.
- Accessibility: Keep your permits in the upper front pocket of your daypack so they can easily be found. Don't keep them deep in your larger pack.
- Forgetting your permits: If you have to turn around from Monjo because you left your permits in Kathmandu, you could lose a full day of trekking and face the cost of replacing your permits.
- Photo backup: Keep a clear photograph of both permits on your phone and also on a cloud drive that your guide can access.
Common Mistakes Trekkers Make
In addition to your permit needs, our team has observed these same mistakes throughout the trekking season for many years. Follow these guidelines before heading out on the trail.
- Overpacking: Many first-time trekkers overpack their gear. Every additional kg of weight in your daypack is added weight that your knees will carry for 6 hours a day for 14 days. Pack light, let your porter carry your main bag, and don't pack as though you're going for a week-long trip.
- Rushing to get to altitude: You'll experience the worst altitude sickness from moving too quickly into higher elevations than your body can adjust to. No level of physical fitness can allow you to go faster than what your body can adapt to. So use the itinerary to determine when to rest and take your rest days.
- Not respecting the yaks: Yaks and dzos are the main means of transport for goods above Namche. They're heavy and powerful animals, and they won't stop for you. When you hear a yak train coming, move immediately to the uphill portion of the trail and stay still. If you're on the downhill part, you risk falling off the edge of the trail when the yaks pass.
- The Khumbu cough is a common occurrence for many trekkers: Above 4,000 m, dry, cold, and dusty air creates a constant irritating cough. It's not dangerous, but it can disrupt sleep. Wear a buff over your nose and mouth while trekking and also carry throat lozenges, plus drink plenty of water.
- Our guides often give the same advice to trekkers by day two. It's also when it typically becomes most challenging.
- Trekking at your own pace matters more than your level of fitness. Trekkers who go slowly and keep going steadily day after day will reach Base Camp. But those who sprint uphill and become exhausted by noon won't always make it.
- Eat something at every meal, even if you're not hungry. At altitude, appetite decreases. But your body still needs energy to function. So even if you don't feel like it, finish your dal bhat.
- Stop and look around. Many people are focused on the trail and miss out on some of the best views. The journey to Base Camp is just as beautiful as reaching Base Camp.
Real-Life Advice from the Trail
- Your pace matters more than your fitness. The trekker who takes their time every single day tends to reach Base Camp. But the trekker who runs uphill and is worn out by noon typically won't.
- Eat at every meal. Your body doesn't need fewer calories at high altitude. It still needs fuel. So force yourself to finish your entire meal even if you don't feel like it.
- Stop and look around. Many trekkers spend too much time looking at the path and miss the incredible scenery along the route to Base Camp. Don't be one of them.
Key Warnings
- Hydrate or suffer. Drinking water is essential to prevent dehydration, which increases your chances of altitude sickness. The higher you go, the more dehydrated you'll be. So drink 3 to 4 litres daily regardless of whether you're thirsty or not.
- Protect yourself from the sun. Don't rely on sunblock alone above 5,000m. UV rays increase by 70% at that elevation. Use SPF 50+ sunblock every day, plus wear UV-protective sunglasses and a hat to avoid snow blindness, which is common after Gorak Shep.
- Battery life diminishes faster in cold weather. A phone battery discharges much faster, around 80% faster, when temperatures drop below 5 degrees Celsius. Always keep your device close to your body to maintain warmth and charge it every single evening.
- Trust your guide. Your guide has been on this trail many more times than you have. They know the signs of altitude sickness before you do. So when they tell you to slow down, take a break, or descend, there's a reason for it. Also, refer back to the number.
Before you Go: Reference our complete Everest Base Camp Trek Difficulty Level Guide for an honest assessment of how physically and mentally demanding each stage of the trek will be and what preparations can be made to help facilitate successful completion of each stage, etc...
Plan Your Everest Trek Permits the Right Way
Here's a simple summary in 3 points.
- You'll need 2 permits before you can enter Sagarmatha National Park. The Sagarmatha National Park Permit costs $30 USD, and the Khumbu Pasang Lhamu Rural Municipality Permit costs $20 USD. A TIMS card is currently not required for those trekking with a guide.
- The total cost of permits for the average non-SAARC trekker will be approximately $50 USD. The government of Nepal sets the fees, so confirm them prior to your departure.
- To obtain your permits, visit the Nepal Tourism Board office in Kathmandu, which is the best option, or at the Monjo checkpoint on the trek.
You don't have to worry about getting a permit because the process is easy. You need to complete a few forms, take a couple of photos, and then just pay the required fee. Generally, most trekkers get everything done in one day in Kathmandu, and once they obtain their permit, they don't think about it again. The trekking part is the more challenging part of the trip. That's where our team will be with you to help you along the way.
If managing permits, logistics, flights, accommodation, and acclimatization sounds overwhelming, you're not alone. That's why we're here. Check out our Everest Base Camp Trek Packages, and we'll handle every detail, including every permit, every booking, everything. So you can just show up, walk, and enjoy the most incredible scenery on earth.
One final tip: Also, the best time to trek to Everest Base Camp is during spring from March to May and fall from September to November. This'll give you the best chance of clear weather and stable processing of all permits.