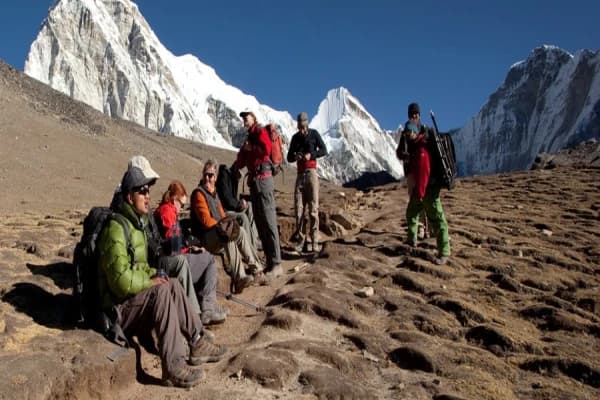
Who Can Do High-Altitude Trekking
Most people used to think that only athletes could do high-altitude trekking. However, the thing is that it varies depending on how seriously you’re prepared. Even if you aren’t a regular workout person, you can still make it possible. If you are just starting out, reading a detailed beginner trekking guide can help you understand the basics before planning your first trip.
Fitness is everything when it comes to trekking in alpine regions. Age isn’t very important. People of almost every age group can experience a nature hike.
Focus on daily cardio and strength exercises at least a month before you trek to enhance your endurance, especially if you aren’t an athlete. Your age and experience don’t matter much. You can safely enjoy challenging treks with proper preparation and the right mindset.
Your current health situation also plays a critical role as much as physical training. Don’t take unnecessary risks just for the sake of experiencing nature’s beauty outdoors.
Please consult your trusted doctor if you’re already a heart or lung patient before planning a trek. Without their advice, it’s not a smart move to stroll in the alpine region. You should prepare your adventure.
Additionally, during the trek, don’t be over-confident, listen to your body, and control your pace. Doing so, your journey will all be safe and successful.
Understanding High Altitude: What Happens To Your Body
High altitude generally starts above 2,400 metres (8,000 feet), where oxygen levels begin to drop significantly. The higher the altitude, the thinner the air. At such a level, there’s less oxygen, making our heart and lungs work harder to keep us moving further. You’ll begin to breathe faster, and your heartbeat follows it. They struggle to supply oxygen to your muscles and organs. Proper acclimatisation plays a key role when hiking at high altitudes because it takes time for your body to produce red blood cells that help carry oxygen.
Walking fast with fewer short breaks along the trail, not drinking enough water, and not spending an extra day at the same point after reaching 3,000 m (9,842.52 ft) can cause altitude sickness, also known as acute mountain sickness (AMS). Understanding altitude sickness symptoms early can help you prevent serious health risks during your trek. There’s a high chance of feeling early signs of AMS, such as headache, tiredness, shortness of breath, dizziness, loss of appetite, or trouble sleeping as you ascend higher.
While these signs of adjustment are normal, severe headache, vomiting, or confusion are danger signals that require immediate attention. Our body needs time to adjust to the lower air pressure. If you experience worsening symptoms such as persistent severe headache, continuous nausea or vomiting, dizziness, confusion, difficulty breathing at rest, or loss of coordination, you must stop ascending immediately and not continue climbing.
In such cases, the safest action is to descend at least 300–500 meters without delay and seek help if needed. Never ignore these warning signs, as continuing to climb can lead to serious and potentially life-threatening altitude-related conditions.
If your body is slow to adapt, you may get sick. Therefore, hike at a normal pace, focus on hydration and consuming energy-rich foods, and listen to your body. This way, you can keep yourself safe throughout the trek. For those interested in combining routes, the Manaslu With Annapurna Circuit Trek offers a more challenging high-altitude experience where proper acclimatisation becomes even more critical due to longer exposure to elevation.
How Should You Train Your Body For High-Altitude Trekking
You should start doing cardio and strength exercises for high-altitude trekking at least three months prior to your journey if you don’t work out daily. This is especially important for long and demanding adventures like the Manaslu With Annapurna Circuit Trekking, where trekkers cross multiple high mountain passes and walk for many consecutive days.
Three-Step Training Summary (Simple Plan):
- Cardio base – build stamina and breathing control
- Strength training – build leg power and stability
- Trek simulation – practice real hiking conditions with weight
Here’s a simple 3-step process for training:
- Cardio: Walking or cycling for 3 to 4 days a week to enhance your cardiovascular base.
- Strength: Do lunges, squats, and calf raises for 2 days a week to build muscle endurance.
- Simulation: Upgrade your training to real trekking conditions by going on a weekly hike to a nearby hill while carrying a weighted backpack.
This simulation helps your body adapt to real trail stress, uneven terrain, and long hours of walking. It also improves your breathing efficiency at higher effort levels. This approach improves your incline training ability, builds muscle endurance, and helps increase your lactic threshold for better performance at altitude.
The lactic threshold is the point where your body starts to feel muscle burn due to lack of oxygen during effort. Training helps delay this point so you can walk longer without fatigue. You must understand that high-altitude trekking isn’t actually a race. It’s a test of steady endurance.
Focus on building strong aerobic capacity so that your body can also perform well in lower air pressure, and also strengthen your legs for a long day hike in the mountains. Before your trek, having a complete ultimate trekking packing list ensures you are fully prepared with the right gear.
During the trek, descending is more challenging than ascending. Sometimes, even when walking slowly, your ankle and knee may get injured. To avoid such situations, you need eccentric strength to have control over your muscles while going down.
Eccentric loading means your muscles work while lengthening, which happens during downhill walking. Training step-down exercises helps build this control. Therefore, train step-downs before the trek and use trekking poles to support your knees while ascending and protect them while descending during the journey.
You can plan your training in a simple 12-week countdown. Enhance your cardio base in the first 2 months and then add longer hikes with a weighted backpack in the third month.
Remember to include rest days and active recovery as well to allow your body to stay fresh. Additionally, consulting your doctor before commencing an intense mountain training session would be wise.
What Essentials Do You Need For High-Altitude Trekking
Before choosing gear, remember the layering principle. In the mountains, no single jacket works for every moment. You add or remove layers depending on the weather and your effort. A typical system uses a base layer to wick sweat, a mid layer to trap warmth, and an outer shell to block wind and rain, which helps regulate body temperature during long treks.
Key essential gear includes the following:
- Base layer for moisture control
- Insulated jacket for warmth
- Waterproof outer shell for protection
- Trekking poles for stability
- Strong trekking boots for support
- Cold-rated sleeping bag for high-altitude nights
Following a detailed ultimate trekking packing list can help you avoid missing any critical gear.
Down Jacket (Insulation Layer)
I once tested a down jacket at 5,000 m during a 4 am summit push, and it kept my core warm even in brutal wind chill. Good down traps heat without adding much weight, but if you’re only doing casual day hikes, a heavy expedition jacket may feel unnecessary.
Merino Wool Base Layer
A good base layer should feel breathable and dry even after hours of hiking. Merino wool is popular because it wicks sweat away from your skin and stays comfortable in changing temperatures.
Waterproof Shell (Gore-Tex or Similar)
When snow or rain hits at altitude, a breathable waterproof shell is essential. Fabrics like Gore-Tex let sweat escape while blocking wind and moisture, so you don’t feel clammy during long climbs.
Trekking Poles
When you lock a good trekking pole, you should feel a solid “click” that tells you it’s secure. Poles also reduce pressure on your knees during steep descents and help with balance on rocky trails.
High-Ankle Trekking Boots
Strong boots protect your ankles and provide grip on uneven trails. However, some heavy alpine boots aren’t ideal for casual trekkers because they can feel stiff and tiring on shorter hikes.
Sleeping Bag
Nights above 4,000 m can be extremely cold. Thus, most trekkers carry a sleeping bag rated around −10 °C to −20 °C for safety and comfort.
Who This Gear Is NOT For
This kind of gear is not necessary for short city walks, light park hikes, or gym workouts.
If you are not trekking in cold, high-altitude, or remote mountain areas, investing in heavy alpine gear may be unnecessary and uncomfortable.
Beginners doing short hikes can start with basic shoes, light clothing, and simple daypacks before upgrading to advanced gear.
Nutrition And Hydration: Fueling The Climb
In this section, we discuss nutrition and hydration, such as what to eat, what to avoid, and how much water to drink, to prevent unwanted situations while trekking at high altitudes. Your diet also plays a significant role.
Nutrition
Pro tip: Avoid alcohol and limit caffeine intake, as they can increase dehydration at high altitudes.
At high altitude, your body often goes into a caloric deficit because it burns more energy than usual.
A long day hike with a heavy backpack burns a lot of calories. Without having sufficient energy in your body, you can’t reach your targeted elevation, and even if you attempt, you may fall ill at any time soon.
So, eat more carbs to stay energized, as high-carb foods such as rice, bread, potatoes, and pasta contain high levels of calories. Eating a heavy-carb diet provides you with energy for a long time, allowing you to cover longer distances and ascend higher.
Furthermore, bring some snacks such as protein bars, chocolate, biscuits, and dry fruits to fuel your body while hiking until you reach a place where food service is available. Last but not least, avoid smoking during the high-altitude trek, as it causes difficulty in breathing and reduces stamina.
Hydration
Drinking alcohol and caffeine may make you look cool, but they dehydrate your body. At high altitudes, staying hydrated is essential.
Drink plenty of water, at least 3 to 4 litres a day, to stay hydrated. You can also mix oral rehydration salts (ORS) in water and consider eating water-rich foods such as apples and cucumbers.
What Is The Climb High, Sleep Low Rule
Acclimatisation or a rest day is a very important part of trekking in the mountains. It’s one of the best prevention methods for altitude sickness.
Think of your body like an engine; if you push it too fast without proper rest, it overheats and fails to perform well at high altitude.
Simple Step-by-Step Explanation:
Step 1: Climb higher during the day
You hike to a higher altitude to expose your body to thinner air.
Step 2: Return to a lower place to sleep.
You come back down and sleep at a lower altitude for better recovery.
Step 3: Repeat gradually.
Your body slowly adapts to lower oxygen levels over time.
You should follow it upon reaching 3,000 m (9,842.52 ft) by spending an extra day at the same height instead of going further.
There’s a common and very helpful rule for trekking at high elevations: climb high, sleep low. On the acclimatisation day, you go for a short hike to a nearby hill and return for an overnight stay so your body gets used to less oxygen.
Don’t aim to sleep higher than 500 m (1,640.42 ft) than the place you stayed overnight the previous day. Walking too quickly and gaining altitude faster than your body can adapt is not a good idea.
If your body shows warning signs, do not ignore them. Rushing is one of the biggest causes of altitude sickness. Bring a pulse oximeter, as it helps you check your oxygen level in your body daily (SpO₂ in percentage, not bpm).
If symptoms do not improve with rest and hydration, you must descend at least 500 m immediately.
Mental Preparation: The "Mind Over Mountain" Approach
Trekking is about 50% mental, and sometimes that wall you hit isn’t physical but in your mind. When I did my first high-altitude trek, the biggest challenge wasn’t the cold or the incline; it was convincing myself to take just one more step when I was tired and drained.
On my first 5,000-metre pass, I wanted to turn back twice; what helped me most was breaking the day into tiny goals, “just to that rock, then the next bend,” and reminding myself that every small victory counts.
We all hit tough moments on the trail: long hours, steep climbs, or bad weather can make you doubt yourself. The best approach is to pace yourself, stay present, and manage expectations; slow and steady wins the mountain, not sprinting to the top.
Talking to yourself positively and focusing on micro-goals helps silence negative thoughts. At the same time, stay aware of your physical condition, because recognizing symptoms of altitude sickness early can save your life.
Grit isn’t about never feeling tired. It’s about recognizing fatigue, pausing, breathing deeply, and continuing one steady step at a time.
What Safety Protocols and Emergency Procedures Should You Follow During High-Altitude Trekking
In my experience on the trail, high-altitude safety always starts with planning before the trek even begins. Make sure your travel insurance covers medical evacuation or heli-evacuation above 4,000 m, because helicopters are often the only way to evacuate injured trekkers in remote mountain areas.
Most guides also suggest carrying a satellite communicator; devices like the Garmin inReach Mini 2 can send SOS messages even without cell service, which is more reliable than relying only on a phone in remote valleys. Never trek alone. The buddy system ensures someone can recognize symptoms and help organize an emergency descent if needed.
In the mountains, there’s one rule every experienced trekker repeats: the summit is optional, but getting down is mandatory. According to high-altitude medicine guidelines, trekkers must watch carefully for early signs of Acute Mountain Sickness (AMS) and descend if symptoms worsen.
Below are the Red Flag Symptoms that you must descend immediately if you find any of them in your body:
- Headache
- Nausea
- Dizziness
These are early warning signs of AMS, and continuing to climb can lead to serious illness.
Move slowly, listen to your body, and don’t ignore warning signs. If symptoms appear, stop ascending and begin an emergency descent; even a few hundred meters can help recovery.
Sustainable Trekking: Respecting the Trails
Sustainable trekking means enjoying the mountains without damaging the environment or local communities. The easiest rule to remember is the “Leave No Trace” principle—pack out all your trash, avoid single-use plastics, and leave the trail exactly as you found it, especially on popular routes like Everest Base Camp.
Even small habits like using a reusable water bottle, staying on marked paths, and not picking plants help protect fragile alpine ecosystems.
Respecting the trails also means respecting the people and wildlife who live there. Support local teahouses and guides, keep noise low, and never feed or disturb animals along the trail. When we trek responsibly and follow sustainable practices, we help keep the mountains clean and beautiful for future trekkers to enjoy.