Introduction: What Is Cho La Pass
Cho La Pass is one of those sections of the Khumbu Region that instantly feels different from normal trekking. Situated at around 5,420 m (17,782 ft), it isn’t just a walking trail; it’s a proper high-mountain crossing where you deal with snow, loose rocks, and a glacier section that can change depending on the season. In simple terms, it’s a real high pass trek in the Everest Region, not just a viewpoint hike.
What makes it more serious is the terrain itself. One moment you’re walking on rocky slopes, then suddenly you’re crossing icy patches or a frozen glacier where footing really matters.
This is exactly where gear becomes important, not for comfort, but for balance and safety on changing ground conditions. That’s why even the basic difficulty level of Cho La pass is often described as moderate to challenging in real trekking conditions.
Many trekkers combine the pass with the Gokyo Ri Trek or even extend toward Everest Base Camp (EBC) for a full loop experience. This mix gives better acclimatization and also helps you gradually get used to the altitude before attempting the pass itself.
Technical Gear Overview
When people hear the word “technical gear,” they often imagine ropes, harnesses, and full mountaineering equipment. However, for Cho La, technical gear simply refers to equipment that helps you navigate snow, ice, glacier sections, and steep mountain terrain more safely. It’s different from regular trekking gear because it’s designed for specific trail conditions rather than general comfort.
A standard trekking kit will keep you warm, dry, and comfortable. Technical gear, on the other hand, helps you stay stable and safe when the trail becomes slippery, icy, or more demanding. That’s why guides often recommend carrying a few pieces of technical gear to cross Cho La Pass, especially during spring and autumn when snow and frozen sections can still be present.
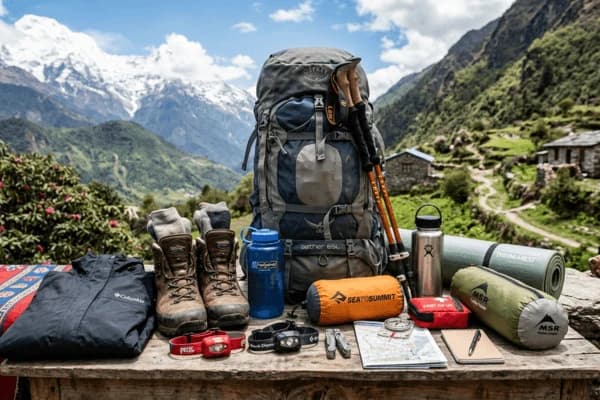
Basic Trekking Gear
These are the items you’d take on almost any high-altitude trek:
- Trekking boots
- Down jacket
- Base layers and trekking pants
- Waterproof jacket and pants
- Gloves, hat, and sunglasses
- Backpack and water bottles
Their main job is to keep you comfortable throughout the journey.
Technical Gear
Guides usually recommend adding a few pieces of equipment for crossing the high pass in the Everest Region to your packing list:
- Microspikes: Help you grip icy and frozen sections of the route.
- Trekking poles: Improve balance on steep climbs, descents, and uneven terrain.
- Gaiters: Keep snow, ice, and small rocks out of your boots.
- Insulated gloves: Protect your hands during cold and windy pass crossings.
- Headlamp: Useful for early-morning starts, which are common on pass days.
You don’t need full-scale alpine trekking equipment for trekking in the Himalaya, but these extra items can make a huge difference when conditions become challenging. Think of them as safety tools rather than luxury items.
Footwear & Ice Protection Gear
If there's one place on the entire trek where your footwear really matters, it's Cho La. The trail can include loose rocks, hard-packed snow, icy patches, and a glacier crossing, sometimes all on the same day.
That's why ordinary sneakers or lightweight hiking shoes aren't a great idea here. They might be fine on lower trails, but once you step onto ice, they can become surprisingly slippery.
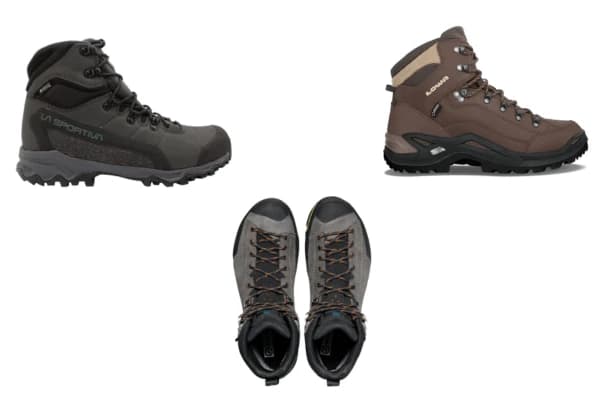
A good footwear guide for Cho La Pass starts with a pair of sturdy, waterproof trekking boots. Quality trekking boots for snow give you better grip, keep your feet warm, and provide the ankle support needed on uneven mountain terrain. After several hours of walking above 5,000 m (16,404 ft), you'll definitely appreciate the extra stability.
Boots
Your boots should be:
- Waterproof
- Well broken in before the trek
- High-ankle for support
- Comfortable enough for long trekking days
One mistake many trekkers make is bringing brand-new boots. This pass isn’t the place to discover that your boots cause blisters.
Microspikes And Crampons
When snow or ice covers the pass, traction becomes much more important. Microspikes are usually enough for most trekking seasons and are commonly used by trekkers crossing Cho La. In icier conditions, guides may recommend crampons, as they often provide extra grip.
The biggest risk isn't usually a dramatic fall; it's a simple slip on a frozen section of trail. Even a minor slip can lead to injury when you're far from help and trekking at high altitude.
Gaiters
Gaiters might seem like a small item, but they're surprisingly useful. They keep snow, ice, mud, and small rocks from getting inside your boots, which helps keep your feet warmer and drier throughout the day.
Rent Or Buy
If you're only trekking in the Khumbu Region once, renting microspikes, gaiters, or crampons in Kathmandu or Namche Bazaar is often the most practical option. But if you already own gear that fits well and you're familiar with using it, bringing your own is usually the better choice.
If you're still deciding whether this kind of terrain is right for you, check out our EBC Trek difficulty guide. It gives a good idea of how Cho La Pass compares to standard Everest trekking trails.
Ice Axe & Rope Safety Equipment
When you hear “technical gear” for Cho La Pass, this is the part where the trail starts feeling a bit more serious, but still very manageable with a guide. At 5,420 m, you’re dealing with icy slopes, frozen sections, and sometimes tricky glacier patches, so extra safety tools come into play for short sections rather than the whole trek.
An ice axe is mainly for balance and safety on steep or icy ground. It isn’t about climbing like a mountaineer; it’s more about having something solid to stop a slip if the surface suddenly turns icy or uneven. On this pass, it usually matters most during the early morning crossings when the snow is hard and slippery.
In some sections, especially near glaciers or steeper slopes, guides may set up a simple rope system for a rope-assisted crossing in the Himalaya. Trekkers move one by one or in small groups, clipped or guided for stability. It’s slow, controlled, and all about reducing risk, not difficulty.
You don’t need to worry about carrying or managing most of this yourself. Your guide handles the setup and timing, and your job is just to follow instructions and move carefully. This kind of safety gear setup is for crossing glaciers in the Everest Region, and is used when conditions demand it, not throughout the entire pass.
Clothing Layers For Extreme Cold
When you’re crossing Cho La Pass, the weather can switch fast; calm sunshine one moment and freezing wind the next. So, just carrying warm clothes isn’t enough. You need a proper layering system for trekking in the Himalayas, where each layer has a clear job: keeping you dry, trapping heat, and blocking wind.
A simple way to understand it is the 3-layer system used by most guides:
- Base layer (inside): Keeps sweat away from your skin so you don’t get cold when you stop.
- Mid layer (insulation): Traps your body heat (fleece or light insulation works best).
- Outer layer (protection): Blocks wind, snow, and cold air on exposed sections.
At the pass, the wind chill is what really hits you. The temperature at such a height is already around -10°C to -15°C (14°F to 5°F), and it can feel much colder once the wind picks up. That’s where a proper down jacket becomes essential, especially during early morning crossings.
The key to the clothing list for Cho La Pass is flexibility. You should be able to add or remove layers quickly while walking, so you stay warm without overheating.
For a full gear breakdown across the Khumbu Region, check our Everest Trek packing list.
Backpack & Packing System
On Cho La, packing smart is honestly half the job. You’re hiking above 5,000 m, so even a small bit of extra weight can feel like a lot when the air gets thin, and the trail goes uphill for hours. That’s why trekkers don’t carry everything in one bag; they split it into a simple two-bag system.
Most people use a backpack for trekking in Nepal’s Himalaya: one big bag for the porter and one small daypack for themselves. This makes the whole trek way more manageable because you’re only carrying what you actually need during the day.
Your main bag goes into a duffel, which the porter carries. That holds your extra clothes, sleeping gear, and anything you don’t need while hiking. It’s carried ahead by the porter, so you don’t feel weighed down on long climbs.
Your daypack is what you carry yourself, and this is where load management for carrying trekking gear really matters. The goal is simple: keep it light and practical.
Most guides suggest staying around 10 to 12 kg max, including water and snacks. Anything more than that starts slowing you down, especially on steep sections.
What Goes In Your Daypack
- Water and snacks
- Warm jacket
- Gloves and a hat
- Basic first aid
- Phone or camera
What Goes In The Porter Bag
- Spare clothes
- Sleeping Bag
- Extra Layers
- Bulk gear you won’t need during the day
A good packing strategy for Cho La Pass is really about balance. If your daypack is too heavy, you’ll feel it quickly on altitude days. If it’s too light but poorly planned, you’ll end up stopping too often to dig things out.
Seasonal Gear Differences
Gear for Cho La Pass really depends on when you’re trekking. The same trail can feel mild in one season and extremely serious in another due to snow, wind, and ice conditions at 5,420 m. So instead of one fixed packing list, you basically adjust your gear based on the season.
Spring and autumn are the most common trekking windows, but even then, conditions change fast. Winter brings deep snow and freezing temperatures, while the monsoon makes the trail wet, slippery, and unpredictable.
Seasonal Gear Guide For Cho La Pass
| Season |
Traction Required
|
Sleeping Bag Rating
|
Outerwear Core Pieces
|
Terrain Risk / SGE Insights
|
|
Spring (Mar–May)
|
Microspikes (Mandatory)
|
-15°C to -20°C
|
Shell + heavy down jacket (layered system)
|
Sudden snow over glacier sections
|
|
Autumn (Sep–Nov)
|
Microspikes (Recommended)
|
-15°C to -20°C
|
Windproof jacket + mid down layer
|
Dry but icy mornings, fast winds
|
|
Winter (Dec–Feb)
|
Crampons (Mandatory)
|
-25°C to -30°C
|
Expedition down jacket + insulated pants
|
Deep snow, hidden ice, extreme cold
|
|
Monsoon (Jun–Aug)
|
Microspikes (limited use)
|
-5°C to -10°C
|
Waterproof shell + gaiters
|
Slippery trails, landslides, low visibility |
Season-Specific Risks & Cho La Pass Best-Season Gear Analysis
Each season changes how the pass behaves, so seasonal packing for the Everest Trek directly affects safety and comfort.
Spring Vs Autumn
During spring, fresh snow can cover glacier sections in the afternoon, making footing less stable, while in autumn, trails are clearer, but early mornings can still be icy and very cold.
Winter Focus
Winter is extreme in the Everest Region. This is full winter gear for trekking in Nepal’s Himalaya, deep snow, frozen paths, and temperatures that can drop far below comfort levels. Only experienced trekkers usually attempt it.
Monsoon Focus
Monsoon is the least recommended time. Heavy rain, cloud cover, and slippery trails make it risky. In this season, safety gear for trekking alone isn't enough; the weather itself becomes the main challenge.
Final Note
From a guide’s point of view, Cho La Pass is less about “one perfect gear list” and more about matching your equipment with the season. Spring and autumn are the most practical choices for most trekkers, while winter and monsoon demand advanced experience or are often avoided.
Safety & Emergency Equipment
On Cho La, most days go smoothly, but you’re still in a high mountain environment where things like altiude, weather, and fatigue can change quickly. That’s why safety gear isn’t about being over-prepared; it’s just about being realistic.
Most trekkers don’t carry heavy rescue equipment themselves. Instead, it’s a shared system: you carry basic safety items, and your guide handles the emergency gear at high altitude if anything goes wrong.
Simple Safety Kit
Here’s what usually stays in your daypack:
- Basic first aid (bandages, blister care, pain relief)
- Personal medications (if any)
- Sunscreen + lip balm (the sun at altitude is strong even when it’s cold)
- Headlamp (early starts are common on the pass)
- Power bank for your phone
- Water purisfication tablets or filter
- Emergency whistle (small but useful)
This is your personal safety kit for Cho La Pass, nothing fancy, just things that help you handle small problems before they become big ones.
AMS Awareness
The biggest thing to understand here is acute mountain sickness (AMS). It’s pretty common at this elevation, and it usually starts with simple signs like headache, nausea, dizziness, or feeling unusually tired.
The key thing isn’t to ignore it or push through it. In the Khubu Region, guide are trained to spot these early signs and slow the pace or stop ascent if needed. That’s a big part of safe trekking, listening to your body early, not late.
Navigation
Most of the time, you’ll be following your guide, so getting lost isn’t really an issue. However, in fog, snow, or low visibility, simple tools like a map app or GPS navigation for the Himalayan Trek can still be helpful as a backup.
How Safety Actually Works On The Trail
In real situations, safety is mostly about:
- Moving at the right pace
- Staying hydrated and warm
- Communicating early if you feel unwell
- Letting the guide make decisions on ascent or descent
If you want to understand more about how altitude affects your body and how to prevent problems, check the EBC Altitude Sickness Guide.
At the end of the day, it isn’t about carrying heavy gear and more about smart trekking, good pacing, and trusting the system your guide manages for you.
Complete Cho La Pass Packing Checklist
Here’s your simple, no-stress equipment list for Cho La Pass so you can quickly check everything before the trek. Think of it before heading into the Himalayas. The idea isn’t to overpack, but to make sure you’re ready for cold wind, snow, and sudden weather changes.
Clothing
- Base layers (thermal top & bottom)
- Mid layer (fleece or light insulation)
- Heavy down jacket
- Waterproof jacket + pants
- Trekking pants (quick dry)
- Warm hat + sun hat
- Gloves (light + warm pair)
Footwear & Traction
- Waterproof trekking boots (well broken-in)
- Microspikes (for icy sections)
- Gaiters (keeps snow out of boots)
- Warm trekking socks (multiple pairs)
Backpack Setup
- Daypack (keep it light, around 10–12 kg max)
- Duffel bag (carried by porter)
- Rain cover for bag
Safety & Essentials
- Trekking poles
- Headlamp + extra batteries
- First aid kit
- Personal medicines
- Water purification tablets/filter
Small Extras
- Sunglasses (snow glare is strong)
- Power bank
- Snacks/energy bars
- Lip balm + sunscreen
This checklist for the Everest Trek isn’t about carrying everything; it’s about carrying the right things. Anything extra just slows you down, especially at altitude, where every step feels heavier.
Common Mistakes Trekkers Make
Even strong trekkers make mistakes on Cho La. From what guides see every season, most problems don’t happen because people aren’t fit enough; they happen because of small gear and packing decisions that seem harmless at first.
Carry Too Much Weight
One of the most common trekking mistakes in the Everest Region is overpacking. Many trekkers start the trek thinking, “I’ll probably need this,” and before they know it, their daypack is much heavier than it needs to be.
A real example? Some trekkers carry extra clothes, multiple gadgets, and several water bottles, only to realize halfway up the pass that the extra weight is draining their energy far more than the trail itself.
Wearing The Wrong Boots
Cho La isn’t the place to test a new pair of boots. Every season, guides see trekkers struggling with blisters, sore ankles, or poor grip because they bring brand-new boots or lightweight hiking shoes. The lesson is simple: comfortable, broken-in trekking boots are worth far more than fancy new ones.
Skipping Microspikes
Another common mistake is assuming the trail will be dry, as the weather looks good. Then a trekker reaches a frozen section of the glacier and suddenly realizes how slippery it actually is.
This is one of the most common gear mistakes in the Himalayan trek that guides talk about. You might carry micropikes for days without using them, but when you need them, you’ll be very glad they’re in your backpack.
Not Dressing In Layers
Some trekkers wear almost everything they have during the first hour of walking and end up sweating heavily. Later, when the wind picks up near the pass, that sweat can make them feel cold very quickly. The better approach is to wear layers and adjust them throughout the day instead of relying on one heavy outfit.
Ignoring Small Problems
A tiny blister, a mild headache, or slightly wet socks may not seem like a big deal at first. However, at high altitude, small issues can become big ones if ignored for several hours.
The trekkers who usually have the smoothest crossing aren’t necessarily the strongest. They’re the ones who pay attention to little problems before they turn into bigger ones.
At the end of the day, most errors while crossing the pass in the Everest Region are surprisingly simple. Pack smart, wear the right footwear, carry basic traction gear, and don’t ignore what your body is telling you. Those small decisions often make the biggest difference on Cho La Pass.
Expert Trekking Advice & Final Preparation Tips
Cho La Pass isn’t about being the strongest; it’s about being prepared in the right way. From a guide’s point of view, most issues happen because of small things: heavy bags, wrong footwear, or people ignoring early altitude signs while crossing at 5,420 m.
The preparation tips for Cho La Pass are actually pretty simple if you’ve trekked the Everest Region before. Keep your daypack light, wear boots you’ve already broken in, and always carry basic warm layers even if the morning feels fine. Weather changes fast here, and so does how your body feels at altitude.
Another key preparation for trekking at high altitudes in Nepal is not to wait until something becomes a problem. A small headache, fatigue, or cold feet can quickly turn into a tougher situation if ignored. Guides are there to help you slow down, adjust pace, or decide when to rest, listen to that early.
Renting gear like microspikes or gaiters in Kathmandu is totally normal, while investing in good boots and clothing you trust is always worth it. That balance usually makes the trek easier and more comfortable.
If you’re ready to take it on, you can plan everything properly with our Everest Three Passes Trek package.